What I Learned
Paint dries.
Who’d’ve thought? Dry paint would completely block up the dispenser. This was a major design oversight that didn’t have an immediate solution. When I discovered the issue, a colleague suggested that I copy inkjet printer designs and use a sponge to keep the dispensing tip from drying.
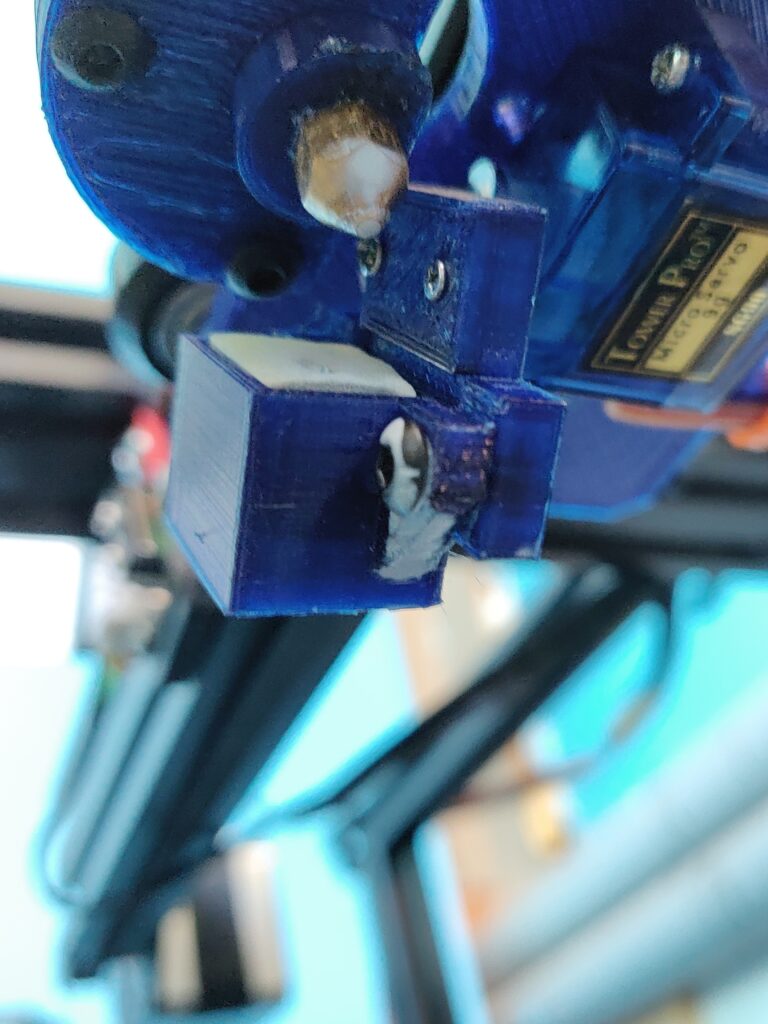
I implemented this by mounting the sponge on a servo inside that blue boxy part in the picture on the right. The brass circular element is the dispensing nozzle and the grey rectangular bit, the sponge. The servo rotates the sponge onto the dispenser when it’s idle. However, it didn’t totally solve the drying issue because the sponge would also dry out if not used for a few hours.
Pressure Problems

Another issue that cropped up was that there was a significant delay (1-2 seconds) between when the pumps turned on, and when the paint began to exit the nozzle.
The image on the left shows the system without paint loaded, but we can see that there is a significant length of tubing between the syringes and the dispenser (the red piece that looks like a tree). One theory as to why I was seeing this delay was that, because the tubing is elastic, it experiences a change in shape as it is pressurized.
Another possibility is that there is a fair amount of dissolved gas (air) in the paint. I would see bubbles forming in the lines and syringes over time. I could use a sonicator to remove the bubbles, but that didn’t seem scalable.
Swappable Syringe Actuator
I thought about trying to get the design with paint mixing on the fly to work by mounting all of the syringe pumps on the moving platform (gantry). However, this seemed to be too large of a time investment for a feature that might not even be desirable. After spending more time studying how people made fluid art, I decided that it would be best to go with a design where individual syringes were swapped in and out of a stepper motor-driven assembly.
I decided to design actuators that could drive threaded rods to compress and withdraw the syringe plunger. There would be many of these actuators with pre-loaded syringes mounted on the tool gantry. The video below shows the working design of the gearbox being driven by a stepper motor, but without the threaded rods in place.
Enough Torque?
I had learned from programming how valuable unit testing is, so with this revision I made sure to test every step of the design instead of waiting until the whole system was assembled to see how the paint dispensing worked.
It wasn’t clear what the mechanical advantage of the gearbox should be. Also, there was a fair amount of friction in the assembly. Some engineers would do calculations to solve this problem, but I decided to just try different designs until finding one that worked. It only took a few iterations!
The video on the left shows this functional design. The stepper motor drives the gearbox, which translates rotational motion into linear via the threaded rods. It worked! At this point, I knew that I could build a system that dispensed paint without the annoying delay that occurred in the previous design.